
Instructor led Wanstead test routes briefing with 3 drills to cure lane hesitation at Redbridge and master A12/A406 merges and High Street.
Master 4 Car Controls DVSA Examiners Watch Before Your First Lesson
Master four things before anything else: steering, the accelerator, the brake (plus the clutch in a manual), and the cockpit drill that comes before you even start the engine. Do the drill, get comfortable with the pedals in a stationary or very low-speed setting, then move on to slow-speed drills in an empty car park. DVSA examiners call this Skill 5, and what they want to see is smooth, coordinated use, not perfection.
TL;DR:
- Mastery of smooth pedal coordination, especially clutch control in manuals and gentle acceleration in automatics, is essential for safe driving and smooth starts.
- Proper steering involves relaxed grips at 8 or 9 and 3 or 4 o’clock, with small corrections using the feed method to avoid overcorrecting.
- The cockpit drill, including seat, mirrors, and safety checks, should be performed routinely even for short trips to develop automatic habits.
- Repetitive low-risk drills in an empty space build confidence in moving off, stopping, reversing, and steering, which are critical skills before driving on public roads.
- Clear understanding of dashboard warning lights, headlight operation, signaling, and climate controls ensures safety and compliance during driving.
Table of Contents
- Car controls for beginners: pedals explained for manual and automatic
- How should beginners hold the steering wheel?
- What is the cockpit drill and why does it matter?
- Gears, selectors and the handbrake: getting hand controls right
- Dashboard instruments and warning lights beginners must recognise
- Practice drills: moving off, stopping, reversing and the figure eight
- Common mistakes beginners make and how to fix them
- Using the windscreen wipers and washers properly
- How do you control headlights, high beams and dipped beams?
- When should you use the horn and other signalling devices?
- Understanding cruise control as a beginner
- Using climate controls safely: defoggers and ventilation
- Why structured lessons speed up mastery of car controls
- Ready to put these controls into practice?
- Sources
Car controls for beginners: pedals explained for manual and automatic
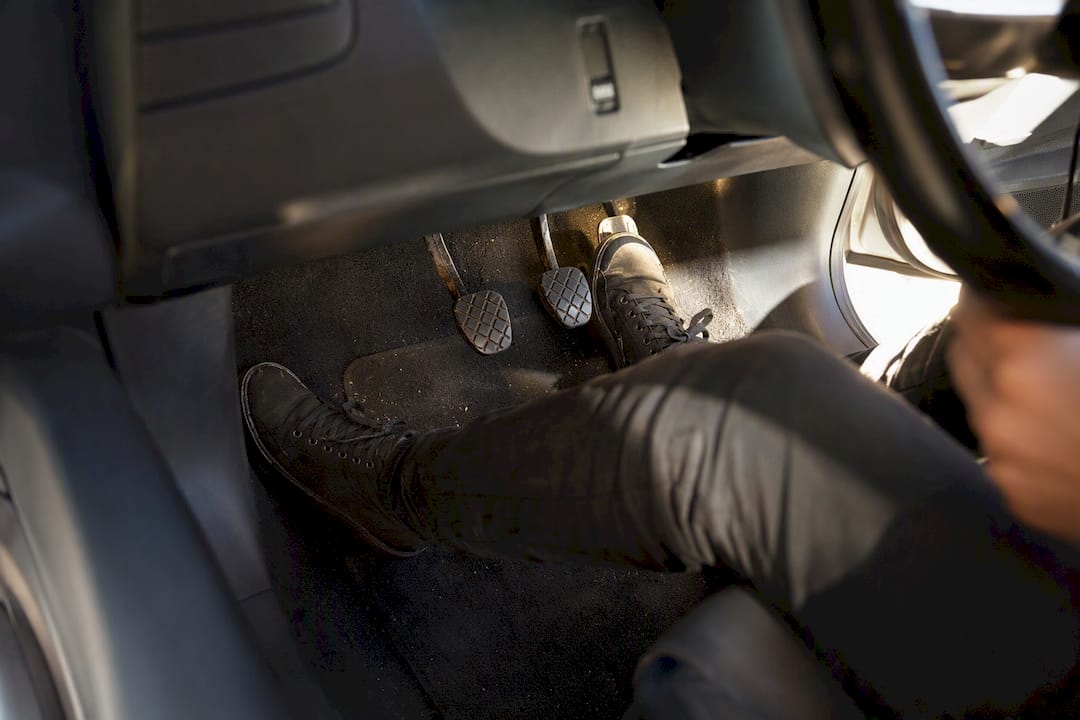
Every car has its pedals in the same order, left to right: clutch (manual only), brake, accelerator. Your left foot works the clutch in a manual car and stays flat on the floor in an automatic. Your right foot handles the brake and accelerator in both, and it never rests on two pedals at once.
The clutch is where most beginners lose confidence. Push it fully to the floor before selecting a gear, and find the “bite point”, the spot where you feel the car wants to move, by lifting slowly until the engine note dips slightly. Hold that point steady, add a touch of gas, and you’re off. Hill starts use the same bite point, just with a firmer grip on the handbrake until the car takes over.
Braking should be progressive: ease the pedal down, let the car settle, then increase pressure smoothly rather than stabbing at it. Sudden braking jolts passengers and can unsettle the car’s grip on wet roads.
- Rest your right heel on the floor and pivot between brake and accelerator using your ankle, not your whole leg.
- Practise clutch control with the engine off first, then in neutral with the engine running, before trying first gear.
- In automatics and electric cars, the accelerator alone controls speed; there’s no clutch to coordinate, so smoothness comes purely from how gently you press.
Pro Tip: Say the pedal movements out loud as you practise, “clutch down, first gear, clutch up slowly.” Verbalising the sequence speeds up muscle memory far quicker than silent repetition.
How should beginners hold the steering wheel?
Most instructors recommend a relaxed grip at roughly the 9 and 3 o’clock positions on the wheel, or slightly lower at 8 and 4 if that feels more natural. A tight, white-knuckle grip actually reduces your feel for the road and tires your arms within minutes.
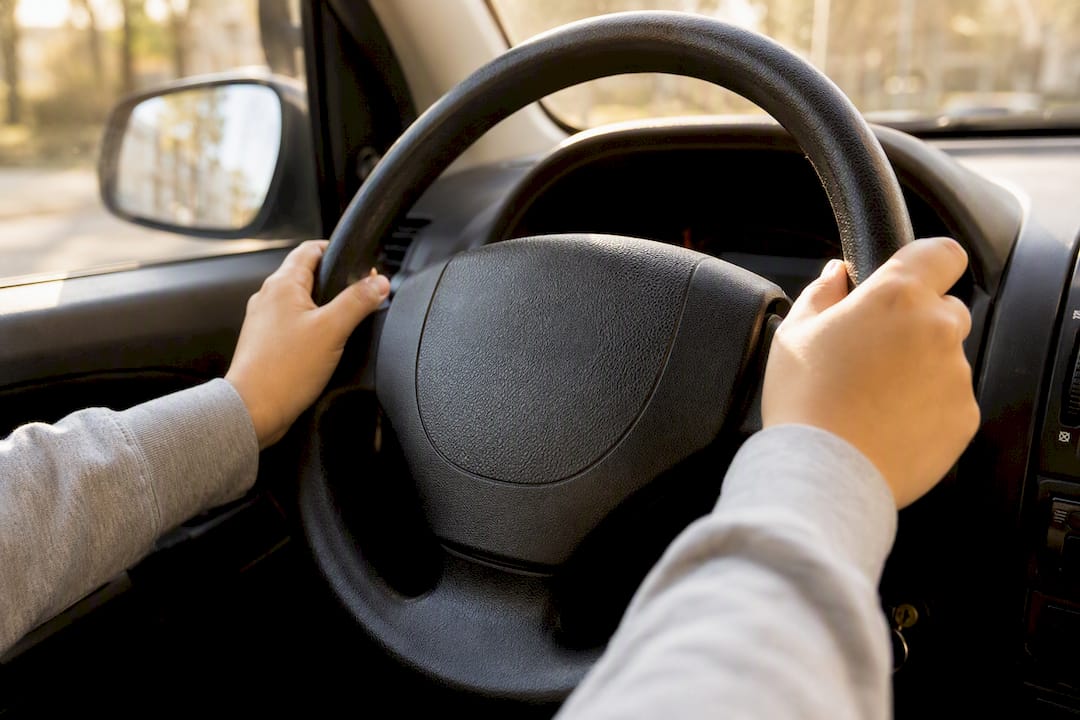
For general steering, use the “pull-push” or feed method: one hand pulls the wheel down while the other feeds it through, keeping both hands roughly opposite each other rather than crossing over. Hand-over-hand steering has its place, mainly for tight turns and manoeuvring at low speed, where you need more wheel rotation quickly.
Small, early corrections beat big, late ones. If the car drifts, nudge the wheel a fraction rather than yanking it back, which tends to overcorrect and set off a wobble.
- Keep your thumbs resting lightly along the rim, not gripping through the spokes, so you can feel the wheel self-centre.
- When reversing, turn the wheel further than feels natural at low speed, since the car responds more slowly in reverse.
- Practise steering circles and figure-eight patterns in an empty car park to build a feel for lock and self-correction, a method backed by driving instructors’ recommended drills.
What is the cockpit drill and why does it matter?
Before you turn the key, run through the same sequence every single time. The Highway Code sets this out clearly, and DVSA examiners expect to see it happen automatically, without prompting, by the time you’re test-ready.
- Adjust your seat so you can reach the pedals fully and see clearly over the wheel.
- Set the steering wheel height and reach if adjustable.
- Check the headrest sits level with the back of your head.
- Put on your seatbelt.
- Adjust both door mirrors and the rear-view mirror.
Beyond the seating drill, a quick walk-round habit pays off: check tyres for obvious damage or flatness, confirm lights work, glance at fluid levels occasionally, and test the brake pedal for firmness before moving off. None of this takes long once it becomes routine.
The Highway Code treats this drill as non-negotiable precisely because habits formed early are hard to unlearn later. A learner who skips mirror checks in week one often still forgets them in week ten.
Pro Tip: Run the cockpit drill even when you’re only moving the car a few metres, into a driveway, say. Repetition in low-stakes moments is what makes it automatic under pressure.
Gears, selectors and the handbrake: getting hand controls right
Manual gear changes follow a fixed rhythm: clutch down, select the gear, clutch up smoothly while adding gas. Lower gears suit slower speeds and more engine control; higher gears suit cruising and better fuel efficiency. As a rough guide, second gear handles most junctions and slow corners, while fourth or fifth suits open roads.
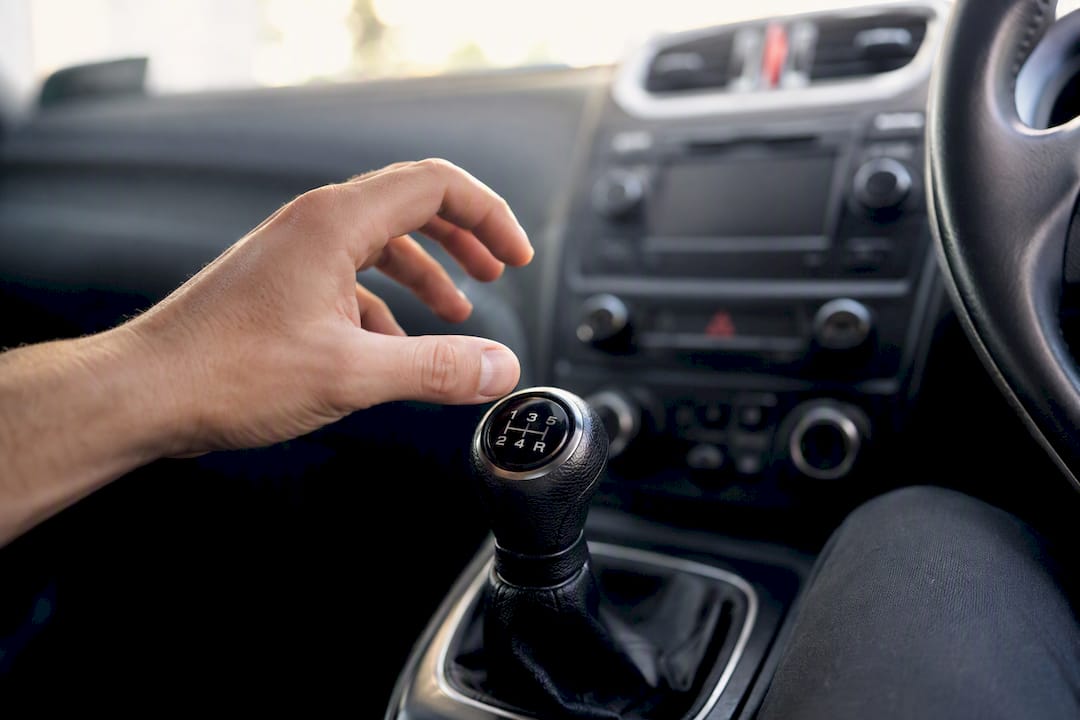
Automatic and electric cars use a selector instead of a gear lever, typically marked P (park), R (reverse), N (neutral), and D (drive). Always confirm P before switching off the engine, and check the selector shows D before releasing the brake to move off; a surprising number of new drivers roll backwards briefly because they’ve selected the wrong letter.
The handbrake (or electronic parking brake in newer cars) holds the car stationary when parked and helps on hill starts, released only once the clutch bite point takes the strain. Many test routes include a hill start, so this pairing is worth drilling specifically.
- Apply the handbrake fully whenever you stop for more than a few seconds, especially at junctions on a slope.
- Learn indicator and wiper stalk positions by feel; ancillary controls are positioned deliberately so you never need to look down or take a hand off the wheel.
- Cancel indicators promptly after turning; most cars self-cancel, but roundabouts often confuse the sensor.
Dashboard instruments and warning lights beginners must recognise
Your main instruments sit directly behind the wheel: a speedometer, a fuel gauge, and, in manual cars, a rev counter showing engine speed to help you judge gear changes. Learning to glance at these without losing sight of the road is a skill in itself, and it comes with repetition rather than effort.
Warning lights follow a simple colour logic. Red means stop and check immediately, something like low oil pressure or a brake system fault. Amber usually means “get it looked at soon” rather than “pull over now,” covering things like a service reminder or an emission fault. Green or blue lights simply confirm a system is active, indicators or full-beam headlights, for instance.
- ABS light: usually amber, flags an issue with the anti-lock braking system; get it checked, don’t panic mid-drive.
- Battery/charging light: red, suggests the electrical system isn’t charging properly.
- Oil pressure light: red, means stop as soon as it’s safe and check the oil level.
The colour coding used across nearly all UK dashboards is consistent enough that learning red, amber, and blue/green as a system beats memorising every individual icon. Keep the owner’s manual in the glovebox for the symbols specific to your car, since manufacturers vary the smaller details.
Practice drills: moving off, stopping, reversing and the figure eight
Coordinated control comes from repetition in a low-risk space, an empty car park, a quiet industrial estate on a Sunday, or a private driveway if it’s large enough. Structure each session around a handful of specific drills rather than vague “have a go” practice.
- Moving off: clutch down, first gear, find the bite point, check mirrors and blind spot, release the handbrake, add gas gently as the clutch comes up fully.
- Stopping: ease off the accelerator, brake progressively, and dip the clutch just before the car stalls. Emergency stops are a test manoeuvre in themselves and should only be practised with an instructor present, never attempted solo.
- Reversing: turn to look over your shoulder through the rear window, steer opposite to instinct at low speed, and keep pace slow enough to stop instantly.
- Figure eight: drive a slow, continuous figure-of-eight pattern around two markers to build steering feel and spatial judgement, a drill widely recommended for early coordination practice.
Run each drill five or six times before moving to the next, and finish every session by repeating the one you found hardest. That closing repetition is what actually locks the skill in, rather than leaving it half-formed. Once bite point, stopping, and steering feel consistent rather than lucky, you’re ready to take those same skills onto quiet residential roads with an instructor.
Pro Tip: Keep sessions to 20 or 30 minutes. Concentration on new physical skills drops off fast, and tired repetition builds bad habits just as quickly as good ones.
Common mistakes beginners make and how to fix them
Riding the clutch, resting your foot on it while driving, wears the clutch plate and makes control jerky. Fix: move your left foot flat to the floor the instant the gear change is complete.
Looking down at the gearstick breaks your view of the road for a full second or more. Fix: learn gear positions by feel, starting stationary with your eyes closed on the gear pattern.
White-knuckle steering tires your arms and dulls your sense of the road. Fix: consciously loosen your grip every few minutes until relaxed hands become the default.
- Two-footed braking (left foot on the brake in a manual) causes confused, jerky stops; keep the left foot for the clutch only.
- Sudden throttle stabs unsettle the car; practise pressing the accelerator as if there’s an egg under your foot.
- Ask your instructor for specific, immediate feedback rather than a general summary at the end, correction in the moment sticks far better.
Pro Tip: Film a short clip of your hands and feet during a car park session (with permission, engine off if unsure). Watching it back reveals habits you don’t notice while driving.
Using the windscreen wipers and washers properly
The wiper control usually sits on a stalk to the right of the steering wheel, though this varies by model, and it typically offers intermittent, slow continuous, and fast continuous settings, plus a single-wipe position for occasional spray or drizzle. A twist grip or separate button on the same stalk usually operates the washer jets, which spray fluid onto the windscreen while the wipers clear it.
Get into the habit of clearing your windscreen fully before setting off rather than relying on a couple of wipes to clear a gap. Reduced visibility through a smeared or partly cleared screen is a common, avoidable hazard for new drivers who underestimate how much it narrows their field of view.
Rear windscreen wipers, where fitted, usually sit on the same stalk or a nearby button, and are worth using proactively in heavy spray from vehicles ahead, not just once the rear view has already misted over. Front and rear washer fluid levels are worth checking during the walk-round habit mentioned earlier in the cockpit drill; running dry mid-journey leaves you unable to clear road grime at the worst moment.
In frost or heavy dirt, avoid running dry wipers across a frozen or gritty screen, since this can scratch the glass and wear the blades prematurely. A short blast of washer fluid first, combined with the heater on the windscreen setting, clears things properly without damage.
How do you control headlights, high beams and dipped beams?
Most cars use a rotating dial or a stalk-mounted switch, often on the left of the steering column, offering off, sidelights, dipped headlights, and an auto setting on newer models that switches lights on automatically in low light or tunnels. Dipped beam is your default for driving after dark or in poor visibility, illuminating the road ahead without dazzling oncoming drivers.
High beam (full beam) throws light much further and is genuinely useful on unlit rural roads with no oncoming traffic, but it must be dipped the moment another vehicle approaches from either direction. Most stalks let you flick briefly forward or pull towards you to activate full beam, with a blue dashboard indicator confirming it’s on, easy to miss if you’re not glancing down occasionally.
Fog lights, where fitted, are a separate switch and should only be used in genuinely poor visibility, not simply in rain or dusk; using them unnecessarily can dazzle drivers behind you. Getting comfortable switching between dipped and full beam without fumbling is exactly the kind of smooth, unhurried control that examiners are watching for under DVSA Skill 5, since fumbling with switches while driving disrupts your steering and lane position.
When should you use the horn and other signalling devices?
The horn exists to warn other road users of your presence, not to express frustration. Its use is genuinely narrow: alerting a driver who hasn’t seen you, warning of a hazard just out of their view, or flagging danger at a blind bend, never as a response to slow traffic or minor annoyance.
Indicators are your most-used signalling device, and timing matters as much as remembering to use them. Signal early enough that following traffic and pedestrians have time to react, but not so early that it becomes ambiguous which junction you mean. Cancel promptly once the turn is complete, since a stuck indicator misleads other drivers about your next move.
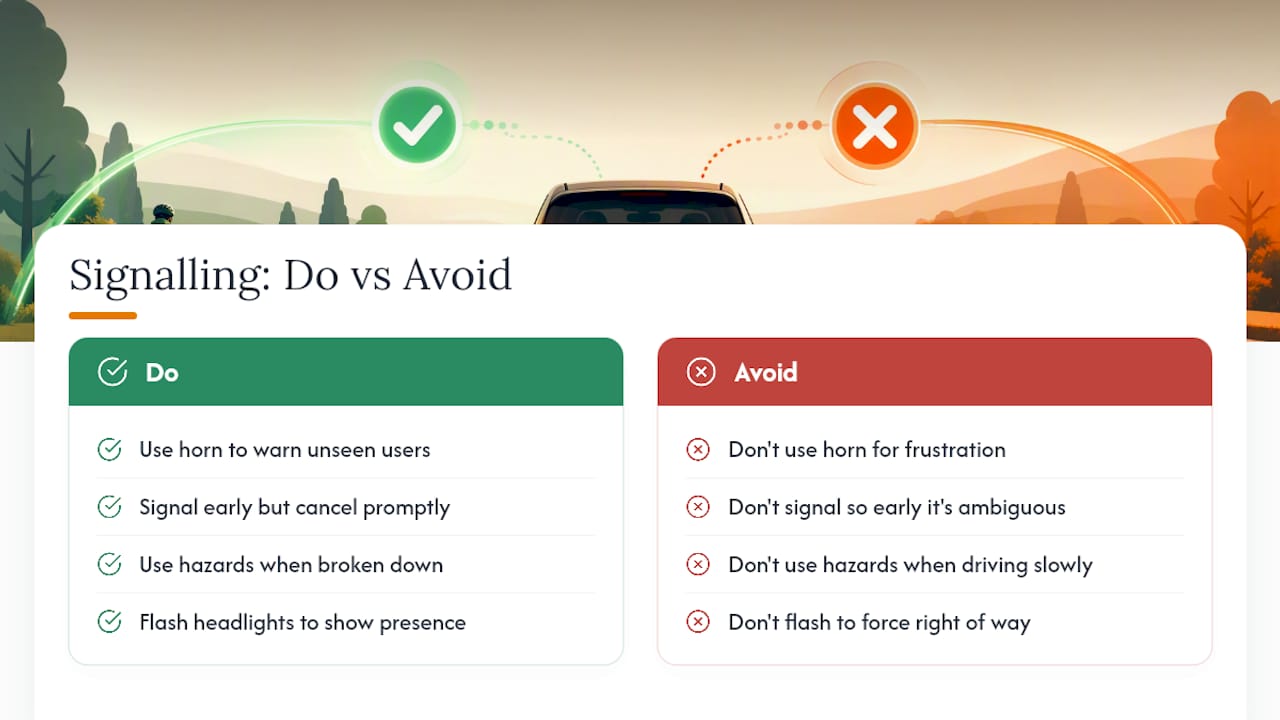
Hazard warning lights, usually a red triangle button near the centre console, tell other drivers your vehicle is stationary somewhere unexpected, broken down, or temporarily blocking a lane. They are not for driving slowly in poor conditions, which is a common misunderstanding among new drivers.
Headlight flashing has one legal purpose: to let another road user know you’re there. It isn’t a substitute for right of way and shouldn’t be used to wave someone through a junction, since responsibility for that decision stays with the other driver regardless of your flash.
Understanding cruise control as a beginner
Cruise control maintains a set speed without you holding steady pressure on the accelerator, activated and adjusted through buttons usually on the steering wheel itself. Many modern cars offer adaptive cruise control, which also maintains a set distance from the vehicle ahead, slowing automatically if traffic ahead slows.
As a beginner, you’re unlikely to use cruise control during lessons or your test, since DVSA examiners want to see you actively managing speed through pedal control, not delegating it to a system. That said, understanding the basics matters once you’re driving independently, particularly on motorways, where sustained speed makes cruise control genuinely useful for reducing fatigue on long journeys.
Never treat cruise control as a reason to disengage from driving; it maintains speed, not steering or hazard awareness, and you still need to brake manually the instant traffic ahead slows unexpectedly, particularly with standard (non-adaptive) systems. Get familiar with how to cancel it instantly, usually a tap of the brake pedal or a dedicated cancel button, before ever relying on it in traffic.
Using climate controls safely: defoggers and ventilation
A misted or frosted windscreen is one of the most avoidable hazards a new driver faces, and it’s entirely preventable with a few seconds’ understanding of the climate controls. The front demister setting, usually shown as a windscreen symbol with upward arrows, directs warm, dry air straight onto the glass and clears fog far faster than simply waiting.
Rear demisters, activated by a separate button often marked with a similar symbol on the rear window, use heated wires embedded in the glass rather than airflow, so give them a minute or two to take effect rather than expecting instant results.
Air conditioning, where fitted, dries the air passing through the system and speeds up demisting considerably, even in cold weather; it’s worth switching on alongside the heater rather than assuming it’s only for summer comfort. Recirculation mode, meanwhile, is useful for quickly warming the cabin but should be switched off when demisting, since it recycles moist cabin air rather than pulling in drier air from outside.
Get comfortable finding these controls by feel before you need them under pressure. Fumbling for the demister switch while your windscreen fogs up in traffic is a genuinely dangerous distraction, and it’s one of the easiest fixes in this entire guide, a single confident press instead of a fumbling glance down.
Why structured lessons speed up mastery of car controls
Textbooks and car park practice teach the theory, but habits form the fastest under a trained eye correcting them in real time. Connect Driving School pairs beginners with DVSA-approved instructors from lesson one, structuring early sessions specifically around cockpit checks, pedal coordination, and steering feel before ever venturing into traffic.
That sequencing matters. Students who build clean control habits early consistently reach test standard faster than those who pick up shortcuts on their own, one reason Connect Driving School’s beginner courses report high pass rates. Lessons run in focused, regular blocks rather than sporadic sessions, since consistency, not intensity, is what actually locks in muscle memory.
For most beginners, two lessons a week strikes the right balance: frequent enough to retain progress, spaced enough to avoid fatigue-driven mistakes creeping back in.
— Zafar
Ready to put these controls into practice?
Reading about bite points and mirror checks only gets you so far. The real progress happens with a qualified instructor sitting beside you, correcting the small habits before they become ingrained ones, which is where Connect Driving School’s structured approach makes the difference for absolute beginners in London.
Every beginner course starts with exactly what this guide has covered: cockpit checks, pedal feel, and steering control, built up gradually with a DVSA-approved instructor rather than guesswork in an empty car park. Lessons are priced individually or as course packages, so you can start with a single introductory session and build from there without committing to a long block upfront. First bookings typically include a short assessment of where you’re starting from, so your instructor can pitch the pace correctly from lesson one rather than assuming.
If you’re ready to turn cockpit drills and bite-point practice into real progress, book your first lesson with Connect Driving School and get matched with an instructor who’ll take you from your very first mirror check through to test day.
Sources
Related Posts
[…] lesson: confirm your seat and mirrors are set before you worry about footwear, run through our car controls guide to know which pedals need the most precision, and practise a gentle heel pivot between accelerator […]