
UK DVSA backed practice plan to lift your hazard perception score. Learn when to click, how scoring works, and how to aim for 44/75.
DVSA Backed Steering Control: Instructor Playbook for UK Learners
The fastest way to improve as a learner is to steer with both hands using a smooth, proportional push and pull motion, and to look where you want the car to go rather than fixating on the road immediately in front of the bonnet. The DVSA learning syllabus asks for smooth, well-timed steering rather than one fixed grip, and that single habit change produces the quickest, most noticeable improvement. The practice drills below show you how to build it.
TL;DR:
- Most learners should focus on practicing push and pull steering regularly to develop smooth, controlled hand movements that improve with consistent dry and in-car practice.
- Looking well ahead and aiming for the exit point of a bend or junction reduces errors more effectively than fixating on the kerb or bonnet, regardless of the steering technique used.
- Hand-over-hand and one-handed steering techniques are useful for specific low-speed, tight maneuvers but should be used selectively and with caution to avoid loss of grip or poor timing.
- Common test faults stem from poor observation and timing, not grip or technique, so early positioning, smooth inputs, and relaxed grip are essential for passing.
- Practicing steering alongside vision and control habits over several weeks, with feedback from an instructor, significantly accelerates skill development and test readiness.
Table of Contents
- The main steering techniques and when to use each
- How to learn push and pull steering step by step
- Hand-over-hand and one-handed steering: when they help and when they don’t
- Where to look: the single biggest fix for steering faults
- Steering through corners, junctions and past parked cars
- Understeer, oversteer and simple recovery for new drivers
- Practice drills and a simple weekly plan for smoother steering
- What examiners actually mark: DVSA steering faults to avoid
- How Connect Driving School teaches steering control
- Adjusting steering for different transmissions and drive types
- Steering in wet, icy or slippery conditions
- Steering in an emergency: evasive moves and sudden obstacles
- Combining steering with acceleration and braking smoothly
- Common steering mistakes and how to fix them during practice
- An instructor’s honest take on steering practice
- Book a lesson to practise steering with a DVSA-approved instructor
- FAQ
- Sources
The main steering techniques and when to use each
Most instructors teach a small handful of methods, and each one suits a different situation. Knowing which to reach for matters more than mastering all of them at once.
Push and pull steering, sometimes called hand-to-hand steering, keeps both hands below the horizontal centre line of the wheel and moves them in a continuous feeding motion. It is the method most instructors introduce first because it keeps your hands clear of the airbag cover and gives you fine control at low speed, which is exactly where new drivers need it most.
Hand-over-hand steering crosses one hand over the other to apply extra lock quickly, useful for tight manoeuvres such as a full lock turn in the road. One-handed steering has a place too, briefly, when operating the gear lever, indicators or handbrake, but it should never become your default style on the move.
Proportional steering simply means matching the amount of lock to what the bend or manoeuvre actually needs rather than guessing. A sweeping dual carriageway bend asks for a small, early input; a sharp residential corner asks for more lock applied a touch later.
- Push and pull: everyday driving, roundabouts, most corners and junctions.
- Hand-over-hand: tight manoeuvres needing full lock, such as turning in the road.
- One-handed: brief use only, while operating another control.
- Proportional control: adjusting the size of your input to match the bend, always combined with one of the above.
Whichever method you use, the examiner cares about the result, not the grip. The DVSA syllabus focuses on smooth, safe control rather than mandating a single technique, which gives you room to find a style that feels natural once the fundamentals are solid.
How to learn push and pull steering step by step
Push and pull steering feels awkward for the first few attempts, then becomes automatic within a couple of weeks of regular practice. Building it in stages, away from traffic first, makes the learning curve far gentler.
- Sit with your hands at roughly the nine and three o’clock positions, thumbs resting lightly on the rim rather than gripping through the spokes.
- To turn right, pull down with your right hand while your left hand feeds the wheel upward to meet it, then slide your right hand back up to re-grip.
- To turn left, mirror the sequence: pull down with your left hand while the right hand feeds the wheel across.
- Keep the motion continuous rather than snatching the wheel in sharp jerks, and unwind the lock at the same steady pace once the turn is complete.
- Practise the hand sequence dry first, using a plate, a book or even a steering wheel key ring, before trying it in a stationary car with the engine off.
- Move on to a quiet car park or empty road at walking pace once the hand sequence feels automatic, focusing purely on smoothness rather than speed.
Dry practice using a plate or similar object trains the hand sequence without any tyre wear or mechanical strain, and it is the step most learners skip even though it shortens the time needed behind the wheel to get it right.
The most common mistake is letting the hands drift above the nine and three position, which forces an awkward crossed-arm reach on tighter turns. The fix is simple: reset your hands to nine and three every time you straighten up after a bend.
Pro Tip: Practise the push-pull motion for two minutes a day on a steering wheel at home before your next lesson, it builds the muscle memory faster than relying on lesson time alone.
Hand-over-hand and one-handed steering: when they help and when they don’t
Hand-over-hand steering lets you apply lock faster than push and pull, which is why it suits manoeuvres like turning in the road, tight car park reversing or a sharp hairpin where you need full lock quickly. One hand crosses over the other on the rim, feeding the wheel round in a continuous spiral rather than a single reach.
The risk is losing a firm grip at the moment you need it most, particularly at speed, so this technique belongs at low speed in controlled situations rather than general driving. One-handed steering has a narrow but legitimate use: briefly letting go with one hand to change gear, operate an indicator or adjust the heater, then returning both hands to the wheel straight away.
- Use hand-over-hand only for tight, low-speed manoeuvres, never as your default cruising style.
- Keep one-handed steering brief and purposeful, always returning to two hands once the control is operated.
- Watch for the ‘swan-neck’ fault, where crossed or twisted arms leave you unable to add more lock if the bend tightens.
- If your arms ever feel tangled mid-turn, straighten up, stop the car if needed, and reset your hand position before continuing.
Where to look: the single biggest fix for steering faults
Steering follows your eyes far more closely than most learners expect. Instructor commentary consistently points to observation as the root cause of most steering problems, and changing where a learner looks often corrects the fault faster than any adjustment to hand technique, according to instructor commentary on steering control.
‘Aim for the gap’ is the simplest version of this idea: pick the space you want the car to occupy, whether that is the centre of your lane on a bend or the gap between a parked van and the oncoming traffic, and look at that space rather than the kerb or the car in front of you. On a bend, look through the apex toward where the road opens out again, not down at the few metres directly ahead.
- Look well ahead, not down at the bonnet or your own hands.
- Pick the gap or the exit point of the bend and steer toward it.
- Scan early so your steering input starts early too, small and smooth rather than late and sharp.
- Avoid fixating on the kerb, a hazard or a mirror for more than a glance, since your steering tends to follow your gaze.
Early, small corrections beat late, large ones almost every time. A driver who looks far enough ahead naturally starts turning the wheel a fraction sooner, which means the input itself can be smaller and gentler. A driver who waits until the bend is right in front of them has to turn the wheel further and faster to stay on line, which is exactly the kind of correction examiners mark down.
Staring at the kerb to judge your distance from it is a classic beginner habit, and it is almost always counterproductive: the car drifts toward whatever you are looking at. The same applies to glancing down at your hands on the wheel. Keep your eyes up and ahead, and let your hands follow what your eyes have already planned.
Steering through corners, junctions and past parked cars
Corners, junctions and parked vehicles cause a disproportionate share of steering faults on the driving test, mostly because learners either turn too early, too late, or apply too much lock and have to correct mid-turn.
- As you approach a junction or bend, assess its sharpness early: a gentle curve needs a small, early input, while a tight corner needs more lock applied closer to the turning point.
- Check your mirrors and begin positioning the car well before you reach the turn, so the steering input itself is the last, smallest step rather than a rescue manoeuvre.
- Turn the wheel at a pace that matches your speed through the junction. Too fast a input at low speed often means over-steering and clipping the kerb on the exit.
- When passing parked cars, judge the gap early and move out smoothly in good time rather than swerving at the last moment, keeping a reasonable distance from both the parked vehicle and any oncoming traffic as advised in ReporterDispatch Reviews: Best Practices for Keeping Your Car in Mint Condition.
- Straighten the wheel progressively as you exit the bend or pull back in after passing an obstruction, rather than letting the wheel self-centre uncontrolled.
- Glance in the mirror after completing the manoeuvre to confirm you have fully recovered your road position.
The GOV.UK list of common failure reasons names ‘not having proper control of the steering’ as one of the most frequent test faults, with examples including steering too early or too late and mounting the pavement, both of which are usually down to misjudging the gap or leaving the correction too late rather than any problem with grip or hand position.
Understeer, oversteer and simple recovery for new drivers
Most learners will never experience serious understeer or oversteer on a test route, but knowing what each feels like, and how to respond calmly, matters for the few times grip is reduced by a wet road or a tight bend taken slightly too fast.
Understeer happens when the front wheels lose grip and the car continues straighter than the steering input suggests, often because of too much speed into a bend. Oversteer happens when the back of the car loses grip first and the rear slides wider than intended, which is rarer in front-wheel drive cars typically used for learning but can still occur on a slippery surface.
- Ease off the accelerator smoothly rather than lifting off suddenly or braking hard, which can make either condition worse.
- Avoid snatching more steering lock. Adding lock into understeer rarely helps, and sudden extra lock into oversteer can make the slide worse.
- Look for the safe path you want the car to take and let your hands follow your eyes back onto that line.
- Treat any skid as a sign to slow down generally, not just an isolated moment to correct and forget.
The DVSA syllabus for guiding and controlling a vehicle specifically asks learners to understand understeer and oversteer as part of steering competence, alongside coordinating steering with the other controls, which means this is examinable knowledge as well as a practical safety skill. If you want hands-on practice beyond what a standard lesson covers, a dedicated skid or skill session with an instructor is a reasonable next step rather than something to attempt alone.
Practice drills and a simple weekly plan for smoother steering
Steering becomes instinctive through repetition, and the learners who improve fastest tend to practise the hand sequence away from the car as well as in it.
- Start with dry practice: hold a book, plate or a spare steering wheel and rehearse the push-pull sequence for a few minutes most days, focusing purely on smoothness.
- In an empty car park, practise a slow figure-of-eight, which forces continuous steering in both directions and quickly exposes any crossed-hand habits.
- Practise slow, deliberate turns into side roads at walking pace, checking that your hands return to nine and three after each one.
- With your instructor, practise passing a line of parked cars repeatedly, judging the gap earlier each time rather than correcting late.
- Add controlled reversing exercises, since reversing exaggerates any tendency to oversteer the wheel through nervousness.
- Gradually increase your speed through the same manoeuvres only once each one feels smooth and unhurried at the slower pace.
A compact three-week approach works well alongside regular lessons. In week one, focus purely on hand position and the push-pull motion at walking pace, with short daily dry practice at home. In week two, add vision drills: aim for the gap on every bend and junction, and ask your instructor to flag any moment you glance down or fixate on the kerb. In week three, combine both skills on busier routes, including roads with parked cars and tighter junctions, and ask your instructor for direct feedback on whether your corrections are becoming earlier and smaller.
Dry practice using a plate, book or similar object trains the hand sequence without wearing the tyres on a stationary car, and it remains one of the most underused tools available to learners between lessons.
Pro Tip: Ask your instructor to watch your eyes for one full lesson rather than just your hands, most steering faults trace back to where you were looking, not how you were holding the wheel.
What examiners actually mark: DVSA steering faults to avoid
Examiners are not grading your grip or which named technique you use. They are marking the outcome: is the steering smooth, timely and under control, or erratic and reactive.
The official list of common test failure reasons includes ‘not having proper control of the steering’ among the most frequent faults nationally, with examples such as steering too early, steering too late, and mounting the pavement. Each of these traces back to timing and observation rather than hand position.
- Double check your mirrors and start positioning early on approach to every junction, rather than leaving the steering decision until the last second.
- Keep a loose, light grip rather than a tense one, since tension tends to produce jerky rather than smooth inputs.
- Straighten up fully and promptly after every turn, checking your position in the mirror.
- If you feel a correction coming, make it small and early rather than waiting and making it large and late.
The DVSA guidance for examiners confirms that steering control faults are assessed alongside smooth use of the gears and brakes, which means steering is never judged in isolation from the rest of your control on the day.
Reading the full syllabus for guiding and controlling a vehicle before your test gives a clear, official picture of exactly what is expected, beyond any technique a particular instructor prefers.
How Connect Driving School teaches steering control
We teach steering in stages rather than expecting learners to manage everything at once. We typically start with dry practice, rehearsing the push-pull hand sequence away from the controls, before moving to dual-control slow drills in a quiet car park where mistakes cost nothing and corrections can happen calmly.
Once the hand sequence feels automatic, the focus shifts to vision: where a learner looks on approach to a bend or junction, and how early they begin positioning before any steering input is needed. Only once both elements are solid do we move to supervised solo practice on quieter roads, building up to busier routes and test-standard junctions.
This staged approach reflects a wider teaching style: patient, personalised to each learner’s pace, and focused on building habits that hold up under test pressure rather than skills that only work in a calm lesson environment.
Adjusting steering for different transmissions and drive types
A manual car demands a split of attention between steering and the clutch, particularly in slow manoeuvres like junctions or parking, where a stalling engine can tempt a learner into a sudden, badly timed steering correction. Practising the clutch control and the steering input separately, then combining them slowly, tends to work better than trying to master both at once.
An automatic removes that juggling act entirely, freeing both hands and more attention for steering and observation, which is one reason some learners find steering smoothness comes more naturally in an automatic car. If gear changes have been distracting you from smooth steering, it is worth considering automatic driving lessons to isolate and build the steering skill on its own.
Most learner cars are front-wheel drive, where power to the front wheels can produce mild understeer if you accelerate hard mid-turn, so a steady, measured throttle through a bend keeps the steering predictable. Rear-wheel drive cars behave differently under power, with a greater tendency for the back to step out on a slippery surface, though this is rarely a concern in standard learner vehicles. Whichever car you are learning in, the same core principles apply: smooth hands, early vision and proportional inputs matched to the car’s actual response. If gear changes themselves need more work alongside your steering, our manual driving lessons build both together at a pace that suits you.
Steering in wet, icy or slippery conditions
Reduced grip changes how much steering input the car actually needs, and the biggest adjustment is simply using less lock, more gently, than you would on a dry road. A steering input that feels entirely normal in the dry can ask more of the tyres than a wet or icy surface can give, which is when understeer or a loss of front grip becomes more likely.
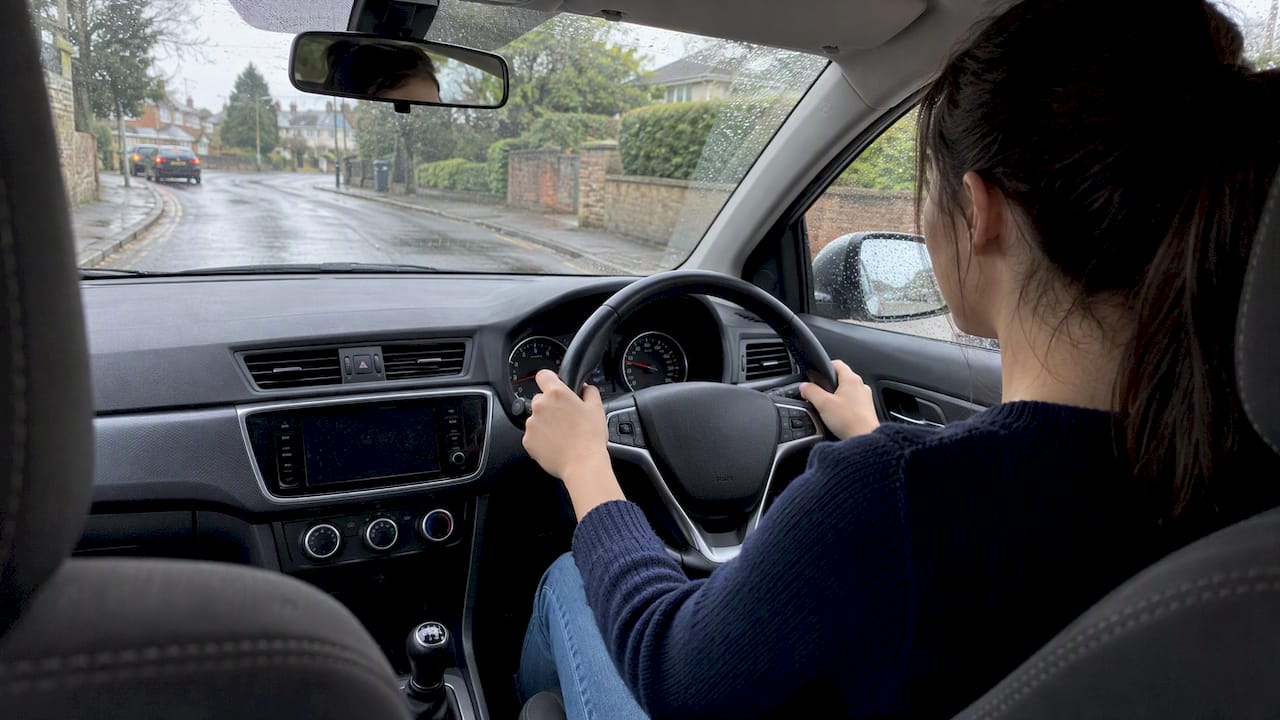
Smoothness matters more than ever in poor conditions. Sudden steering movements, even small ones, are more likely to unsettle the car when grip is already reduced, so every input should be gentler and slightly earlier than usual to compensate for the slower, more gradual response of the tyres.
Reducing speed before a bend rather than during it gives the steering far more to work with, since braking and steering at the same time on a slippery surface asks too much of the available grip. If you do feel the car start to slide, ease off the accelerator rather than braking hard or snatching more lock, and look toward where you want the car to settle rather than at the hazard itself.
Puddles and standing water deserve particular care, since hitting one at an angle with full steering lock applied can momentarily reduce your control. Reducing speed and straightening the wheel slightly before driving through standing water keeps the car more predictable on the other side.
Steering in an emergency: evasive moves and sudden obstacles
Most learners will go through their entire test, and much of their early driving, without ever needing an emergency steering manoeuvre, but knowing the basic principle matters. The instinct to swerve hard away from a sudden obstacle is natural, but an uncontrolled, oversized steering input is often more dangerous than the obstacle itself, particularly at speed.
The safer approach, where there is room and time, is a firm but controlled steering input toward a genuinely clear path, combined with braking as hard as conditions safely allow before or during the manoeuvre rather than after it. Looking at the escape path, not at the obstacle, keeps your hands following a route rather than a fixation, echoing the same vision principle that governs ordinary cornering.
Oversized, panicked steering inputs risk a second loss of control, swinging wide into another lane or losing grip entirely, which can turn a single hazard into a worse situation. A measured, decisive input beats a wild one every time, and the same proportional thinking used for ordinary bends, matching the size of the input to what is actually needed, applies just as much under pressure.
This is an area where deliberate, supervised practice with an instructor is worth far more than reading about it, since the muscle memory for a calm, controlled response under sudden pressure is built through repetition in a safe setting, not through theory alone.
Combining steering with acceleration and braking smoothly
Steering rarely happens in isolation. The DVSA syllabus specifically asks learners to coordinate steering with the other controls, and in practice that means finishing your braking before you start turning wherever possible, rather than steering and braking hard at the same time.
Entering a bend on a steady or gently reducing throttle, then easing back onto the accelerator once the car is pointed where you want it to go, keeps weight balanced across all four tyres and makes the steering itself far more predictable. Braking mid-turn shifts weight forward, reducing grip at the rear, while accelerating too hard mid-turn in a front-wheel drive car can produce understeer, pushing the front wider than intended.
The practical rule most instructors teach is slow in, smooth through, controlled out: reduce speed before the bend, steer through it on a settled, consistent throttle, then accelerate away once the wheel is nearly straight again. This sequencing matters more for smooth steering than any detail of hand position, and it is often the missing piece for learners who have the push-pull motion right but still feel jerky through corners.

Common steering mistakes and how to fix them during practice
A few faults appear again and again in lessons, and most have a simple, specific fix rather than requiring a complete change of technique.
- Crossed or tangled hands mid-turn: reset to nine and three as soon as you straighten up, every single time, until it becomes automatic.
- Staring at the kerb or bonnet: consciously lift your eyes to the far end of the road or the exit of the bend, and ask your instructor to flag it whenever it happens.
- Late, large corrections: start scanning and positioning earlier on approach, so the final steering input becomes small rather than sudden.
- A tense, white-knuckle grip: loosen your hold deliberately, since a relaxed grip almost always produces a smoother result than a tight one.
- Steering and braking at the same time through a bend: finish slowing down before you turn in, then steer on a settled throttle.
Correcting the underlying habit, usually vision or timing rather than hand technique itself, tends to resolve several of these faults simultaneously, which is why instructors so often return to ‘where were you looking’ as their first question after a wobbly manoeuvre.
An instructor’s honest take on steering practice
The learners who improve fastest are rarely the ones who grip the wheel tightest or overthink their hand position. They are the ones who relax their shoulders, breathe normally through a manoeuvre, and genuinely look where they want the car to go rather than where they fear it might end up.
Small hand movements almost always beat big ones. If you notice yourself making a large correction, it usually means the input before it was either too late or aimed at the wrong spot on the road.
The fastest wins come from vision, not grip: spend one lesson consciously lifting your eyes further down the road and the smoothness often follows within minutes. From there, a focused lesson or two on steering specifically, rather than a general drive, tends to cement the habit quickly.
— Mudassar
Book a lesson to practise steering with a DVSA-approved instructor
Steering improves fastest with structured, supervised repetition, which is exactly what a focused lesson gives you. Our First Driving Lesson is a practical starting point if you want to build the push-pull motion and vision habits properly from the outset, with a DVSA-approved instructor watching your hands and your eyes rather than just your overall driving.

If you already drive but want to iron out late corrections or kerb clips before a test, refresher lessons target exactly that, while Pass Plus courses extend the same steering discipline to higher-speed roads once you have passed. For learners wanting faster progress, intensive driving courses compress this staged approach, dry practice, slow drills, then supervised road work, into a shorter timeframe. Every lesson is delivered by an approved instructor, and the first lesson may be covered by a satisfaction guarantee if it is not right for you.
Full details on every course, including current prices, are on our lesson prices and packages page. Book a focused steering lesson there and start building the habit properly rather than hoping it clicks on its own.
FAQ
What are four different types of steering techniques?
The four most commonly taught are push and pull (hand-to-hand), hand-over-hand, one-handed steering for brief control changes, and proportional steering, which matches the size of the input to the bend. The DVSA syllabus focuses on the outcome, smooth and safe control, rather than requiring one specific method.
What are some effective steering techniques?
Push and pull steering is the technique most instructors introduce first, since it keeps both hands below the airbag area and offers fine control at low speed. Combining it with early, proportional inputs and looking through the bend toward your exit point, rather than at the kerb, tends to produce the smoothest results according to instructor commentary on steering control.
How can I get better steering control?
Practise the push-pull hand sequence away from the car using a plate or book, then repeat it slowly in a quiet car park before building up speed. Pairing that with deliberately looking further ahead, aiming for the gap rather than the obstacle, corrects most steering faults faster than hand position alone.
What is the safest technique for steering wheel control?
There is no single mandated grip, but push and pull steering with hands kept below the horizontal centre line is widely taught as the safest default, since it keeps hands clear of the airbag cover and offers good control at typical learner speeds. Experienced instructors note that pull-push is a useful foundational skill rather than the only acceptable method, and most learners naturally adapt it slightly as they gain confidence.
What does Connect Driving School charge for a first lesson?
Our First Driving Lesson is competitively priced, with full details and package options listed on our prices page.
Sources
Related Posts

Comments (0)